Key takeaways
- Using metal tools: A single deep scratch can make food stick in that area and may expose the underlying metal.
- Putting a hot pan in cold water: Sudden temperature changes can warp the sheet.
- Relying on the dishwasher: Detergent, high heat, and repeated water pressure can shorten the coating’s life. Hand washing is the safer default, even when a label says the pan is dishwasher-safe.
- Using cooking spray every time: Aerosol residue can form a gummy layer, especially around raised edges.
- Cutting food on the pan: Pizza cutters and knives can permanently mark the finish.
- Overheating an empty sheet: A bare pan left in a hot oven can experience more heat than necessary.
- Stacking pans without protection: Repeated sliding creates fine abrasions that may not be visible at first.
- Ignoring warping: A sheet that rocks on a flat counter may cook unevenly and can be unsafe to handle.
Nonstick baking sheets make cleanup easier, but the coating can wear out quickly when exposed to sharp utensils, sudden temperature changes, abrasive cleaners, or excessive heat. Scratches may cause cookies and roasted vegetables to stick, while built-up grease can create uneven browning and smoke. Learning how to maintain nonstick coating on baking sheets helps preserve smooth release, reduces scrubbing, and extends the useful life of your bakeware. The routine is simple: use moderate heat, handle the pan gently, wash it by hand, and store it so the surface is not rubbing against metal or other cookware. These steps apply to carbon steel and other coated baking sheets, including everyday sets purchased in 2026.
What You Need
| Item | Why | Optional? |
|---|---|---|
| Soft sponge or microfiber cloth | Removes food and grease without scratching the coating | No |
| Warm water and mild dish soap | Loosens residue and dissolves cooking oils | No |
| Silicone, wood, or nylon spatula | Protects the finish when lifting baked food | No |
| Oven mitts | Prevents drops and impacts while the pan is hot | No |
| Parchment paper or a silicone baking mat | Reduces sticking and limits direct contact with oily foods | Yes |
| Cooling rack | Lets air circulate and prevents trapped moisture after washing | Yes |
| Nonstick baking sheet set | Provides different sizes for cookies, snacks, and sheet-pan meals | Yes |
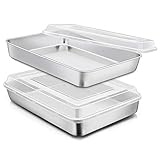
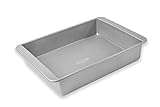
For an affordable replacement or starter set, the NutriChef 3-Piece Nonstick Cookie Sheets are commonly listed around $15 to $25 and include carbon steel pans with red silicone handles. The GoodCook Everyday Nonstick Baking Sheet Set, a three-pack with small, medium, and large pans, is commonly listed around $14 to $22. Prices change by retailer and sale, so treat those ranges as buying guidance rather than fixed prices. Before using any set, read its care instructions and maximum-temperature rating.
As an Amazon Associate we earn from qualifying purchases at no extra cost to you. Product prices and availability are accurate as of the date shown and are subject to change.


Step-by-Step
1. Read the care label first (2 minutes)
Check the packaging or manufacturer’s instructions for the maximum oven temperature, dishwasher guidance, and whether the pan is safe under a broiler. If no temperature is listed, avoid extreme heat and keep routine baking at or below 400°F. Never assume that a silicone handle, painted exterior, or decorative finish has the same heat tolerance as the metal pan.
2. Prepare the surface before baking (1 to 3 minutes)
Start with a clean, completely dry sheet. For delicate cookies or sticky foods, place parchment paper or a silicone baking mat on the flat baking surface. Leave a small border around the edges so paper does not touch an oven heating element. Do not spray aerosol cooking spray directly onto a nonstick sheet unless the care instructions specifically allow it. Propellants and concentrated oil can leave a tacky film that is difficult to remove.
Use only a thin layer of neutral oil when a recipe requires greasing. Spread it evenly with a paper towel rather than allowing oil to pool in corners. Excess fat can bake onto the coating and contribute to discoloration.
3. Bake at a controlled temperature (recipe time)
Preheat the oven fully before placing the sheet inside. Avoid using a nonstick baking sheet for empty preheating, since unnecessary exposure to heat can stress the finish. Most cookies, biscuits, and vegetables can be prepared at ordinary baking temperatures between 325°F and 425°F, but follow the recipe and the pan’s rating.
Keep the sheet at least several inches away from an exposed heating element. Do not place it directly on the oven floor, and do not use it under a broiler unless the manufacturer expressly says it is broiler-safe. High, concentrated heat can damage the coating even when the oven’s general temperature appears acceptable.
4. Cool the pan gradually (15 to 30 minutes)
When baking is complete, remove the sheet with dry oven mitts and place it on a heat-resistant surface or cooling rack. Let it cool naturally for at least 15 minutes before washing. Do not pour cold water onto a hot pan or move it from a hot oven directly into a cold sink. Thermal shock can warp the metal, loosen handles, and stress the nonstick surface.
Allow baked food to cool briefly before lifting it. Slide a silicone, wood, or nylon spatula beneath each item. Avoid knives, forks, metal turners, and bench scrapers, which can create small scratches that grow with repeated use.
5. Soak and wash gently (5 to 10 minutes)
Once the pan is warm rather than hot, rinse away loose crumbs. Add warm water and a small amount of mild dish soap, then let stubborn residue soak for 5 to 10 minutes. Wipe the surface with a soft sponge or microfiber cloth using light pressure.
For baked-on spots, repeat the soak instead of reaching for a scouring pad. A soft nylon brush can help with corners and edges, but avoid steel wool, abrasive powders, melamine sponges, and rough scrubbers. Do not use oven cleaner, bleach, or other harsh chemicals unless the manufacturer specifically approves them.
6. Rinse, dry, and store carefully (3 to 5 minutes)
Rinse away all soap, then dry the sheet immediately with a soft towel. Leaving water on carbon steel can encourage rust on exposed edges, scratches, or the underside. For extra assurance, place the pan in a warm oven that has been turned off for a few minutes, but only if the manufacturer permits this practice.
Store sheets vertically or stack them with a clean dish towel, felt separator, or paper towel between pans. Keep metal utensils, cast-iron cookware, and heavy pots from sliding across the coated surface. Do not place anything heavy on top of a thin sheet, since bending can lead to uneven heating and premature coating damage.
Mistakes to Avoid
- Using metal tools: A single deep scratch can make food stick in that area and may expose the underlying metal.
- Putting a hot pan in cold water: Sudden temperature changes can warp the sheet.
- Relying on the dishwasher: Detergent, high heat, and repeated water pressure can shorten the coating’s life. Hand washing is the safer default, even when a label says the pan is dishwasher-safe.
- Using cooking spray every time: Aerosol residue can form a gummy layer, especially around raised edges.
- Cutting food on the pan: Pizza cutters and knives can permanently mark the finish.
- Overheating an empty sheet: A bare pan left in a hot oven can experience more heat than necessary.
- Stacking pans without protection: Repeated sliding creates fine abrasions that may not be visible at first.
- Ignoring warping: A sheet that rocks on a flat counter may cook unevenly and can be unsafe to handle.
How Often
Wash the baking sheet after every use, even when it looks clean. A thin layer of oil can oxidize and become sticky during the next baking cycle. Inspect the surface after each wash for food buildup, scratches, peeling, or rust at the rim.
Deep-clean the sheet whenever grease feels tacky or food begins sticking in an area that was previously reliable. Usually, a 10-minute warm-water soak and a second gentle wash are enough. If you bake several times a week, check the coating and edges monthly. Reapply seasoning only if the manufacturer specifically recommends it; many nonstick coatings should not be treated like bare cast iron.
When to Call a Pro or Replace
Most home cooks do not need professional repair for a nonstick baking sheet. Replace it if the coating is peeling, flaking, bubbling, or exposing broad areas of the base metal. Also replace a pan with deep scratches, severe rust, a loose handle, a sharp warped edge, or persistent sticking that remains after careful cleaning.
A small exterior stain or a superficial mark that does not affect the cooking surface is usually cosmetic. However, do not sand, scrape, repaint, or attempt to recoat the interior at home. Replacement is generally more practical and safer than modifying the finish. A basic three-piece set priced around $14 to $25 can cost less than trying to restore a damaged pan.
FAQ
Can I use parchment paper on a nonstick baking sheet?
Yes. Parchment can reduce sticking and limit grease contact, but it must remain clear of heating elements and should be used within its package temperature rating. Do not confuse parchment with wax paper, which is not intended for ordinary oven baking.
Should I grease a nonstick baking sheet?
Not always. Many cookies and prepared foods release without added grease. Follow the recipe, and use a very thin layer of oil when needed. Avoid heavy aerosol buildup, which can leave a sticky residue over time.
Why is my nonstick sheet sticking after only a few uses?
Possible causes include baked-on oil, excessive heat, a scratched surface, insufficient cooling before washing, or a recipe with a high-sugar filling. Soak and gently clean the sheet first. If sticking continues in one damaged area, replacement is the better option.
Are nonstick baking sheets dishwasher-safe?
Some are labeled dishwasher-safe, but hand washing usually gives the coating a gentler routine. Check the care label for your exact model. Regardless of the label, avoid abrasive detergent, high-heat drying, and contact with sharp utensils inside the dishwasher.