Key takeaways
- Do not quench hot stainless steel. Cold water over a hot pan is a common cause of thermal shock and warping.
- Do not use a steel hammer. It can gouge the surface, create burrs, and damage food-contact areas.
- Do not flatten the rim by force. A distorted rim may stop a lid from sealing or make the pan unsafe to handle.
- Do not overcorrect. Check the pan after every few taps; repeated force can turn a mild bow into a crease.
- Do not heat an empty pan to extreme temperatures. Avoid broiling and temperatures above about 400°F for this repair.
- Do not repair a pan with a cracked weld or sharp split. Cleaning and handling it can cause cuts, and the pan may fail under the weight of food.
- Do not assume thicker is always better. When buying a replacement, look for a rigid base, rolled edges, and a size suited to your oven. Oversized 16-inch sheets may not sit securely in smaller ovens.
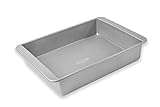
A warped stainless steel baking pan can wobble on the oven rack, cook unevenly, spill grease, or leave cakes and cookies tilted. The wrong repair method can make the problem worse: heating an empty pan aggressively may deepen the warp, while striking the metal directly can create dents, sharp edges, or permanent weak spots. The safest approach is gradual, controlled correction with the pan cool, supported, and protected by wood or a towel.
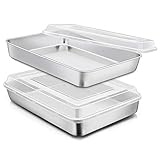
This guide explains how to fix a warped stainless steel baking pan at home and how to decide whether repair is worthwhile. It applies to common sheet pans, roasting pans, and smaller cake pans, including a 12⅓ x 9¾ x 2-inch lidded pan. Stainless steel is strong, but thin cookware may not return perfectly flat after severe thermal shock.
As an Amazon Associate we earn from qualifying purchases at no extra cost to you. Product prices and availability are accurate as of the date shown and are subject to change.

What You Need
| Item | Why | Optional? |
|---|---|---|
| Flat, sturdy work surface | Provides a stable reference for checking the pan and correcting the high spot. | No |
| Wooden block, approximately 2 x 4 x 6 inches | Spreads tapping force without scratching or sharply denting stainless steel. | No |
| Rubber or rawhide mallet, 8–16 ounces | Delivers controlled, low-impact taps. | No |
| Thick folded towel | Protects the finish and your hands while supporting the pan. | No |
| Straightedge or ruler | Helps locate gaps and confirm whether the base is becoming flatter. | Optional |
| Oven thermometer | Useful if you choose a gentle warming step instead of working at room temperature. | Optional |
| Replacement pan | A practical alternative if the metal is cracked, badly dented, or unsafe. | Optional |
For replacement context, a basic stainless steel cake or roasting pan often costs about $20–$30, while a three-piece cookie sheet set commonly runs about $30–$45. For example, a 12⅓ x 9¾ x 2-inch E-far stainless steel pan with lid is listed around $22–$25, and a three-pan 9-, 12-, and 16-inch stainless steel set is commonly around $30–$40. Prices vary by seller and finish, so compare construction and thickness rather than price alone.
Step-by-Step
1. Let the pan cool completely — 30 to 60 minutes
Do not try to straighten a pan immediately after baking. Set it on a heat-safe surface and allow it to reach room temperature. Moving or hammering hot stainless steel can cause burns and may increase distortion. Remove any lid, rack, parchment, or stuck-on food.
2. Clean and inspect the pan — 10 minutes
Wash the pan with warm water and dish soap, then dry it thoroughly. Look for cracks, split seams, sharp burrs, deep creases, or a base that has separated from a bonded layer. A small raised center or a slight rocking motion is usually repairable. A torn corner or sharp edge is not a good candidate for home repair.
3. Identify the direction of the warp — 5 minutes
Place the pan on a flat surface and gently press each corner. If the center is raised and the pan rocks on its edges, it has a convex, or “domed,” base. If the center sits low while the rim rocks, it has a concave base. Also check whether only one corner is bent.
Use a straightedge across the bottom if the shape is difficult to see. Do not force the pan flat with your hands; the goal is to identify the high area before applying pressure.
4. Try gentle hand pressure first — 2 to 5 minutes
For a mild warp, place a folded towel on the work surface and set the pan bottom-up. Put another towel over the pan. Press down slowly on the high area with the heel of your hand, then check the pan on the flat surface. Work around the distorted section instead of pushing hard in one place.
If the pan flexes easily, this may be enough. Stop if the metal begins to crease, squeak sharply, or develop a visible dent.
5. Correct a raised center with a wood block — 5 to 10 minutes
For a domed bottom, place the pan upside down on the towel. Set the wooden block over the raised center or the area immediately around it. Tap the block lightly with the rubber mallet, using one or two controlled taps at a time. Recheck the pan after every few taps.
Use only enough force to move the metal gradually. An 8–16-ounce mallet is preferable to a heavy hammer. Never strike stainless steel directly with metal, and do not pound the same spot repeatedly. Direct impacts can leave a permanent dimple that is harder to correct than the original warp.
6. Support the rim when correcting a low center — 5 to 10 minutes
If the center is low, place the pan right-side-up on a towel and support the rim evenly. You can use two flat wood strips under opposite sides, provided they are stable and the pan cannot slip. Place the wood block over the low area from inside the pan and apply gentle downward pressure to the surrounding high points, or turn the pan over and tap the raised underside around the perimeter.
Make small adjustments rather than trying to reverse the entire shape at once. The rim should remain level; bending the sides can prevent lids from fitting and may create sharp corners.
7. Use gentle warmth only if room-temperature correction fails — 20 to 30 minutes
For a stubborn but otherwise sound pan, warm it gradually in an oven set to about 250–300°F. Place it empty on a level rack for 10–15 minutes, then remove it with oven mitts and let it cool on a flat, heat-safe surface with a towel between the pan and surface. You may place a flat wood board or another heat-safe, non-scratching object on top with light, even pressure.
Do not use a broiler, stovetop burner, open flame, or extreme temperature change. Do not put a cold pan into a very hot oven or run cold water over a hot pan. Heating can help relieve minor stress, but it can also worsen a severe warp, so stop if the shape changes unexpectedly.
8. Test it before cooking — 5 minutes
After the pan is completely cool, wash and dry it again. Set it on a level counter and press each corner. It should sit securely without rocking. Fill it with about 1 cup of water and check whether the water pools dramatically to one side. A slight slope may be acceptable for roasting, but it is undesirable for cakes, thin batters, and cookies.
Mistakes to Avoid
- Do not quench hot stainless steel. Cold water over a hot pan is a common cause of thermal shock and warping.
- Do not use a steel hammer. It can gouge the surface, create burrs, and damage food-contact areas.
- Do not flatten the rim by force. A distorted rim may stop a lid from sealing or make the pan unsafe to handle.
- Do not overcorrect. Check the pan after every few taps; repeated force can turn a mild bow into a crease.
- Do not heat an empty pan to extreme temperatures. Avoid broiling and temperatures above about 400°F for this repair.
- Do not repair a pan with a cracked weld or sharp split. Cleaning and handling it can cause cuts, and the pan may fail under the weight of food.
- Do not assume thicker is always better. When buying a replacement, look for a rigid base, rolled edges, and a size suited to your oven. Oversized 16-inch sheets may not sit securely in smaller ovens.
How Often
A properly corrected pan should not need routine straightening. Inspect it every few months if you bake frequently, especially after using it at temperatures above 425°F or after washing it while very hot. Prevent future warping by letting the pan cool naturally for at least 10–20 minutes before washing and by avoiding sudden temperature changes.
Use a pan that fits the oven rack with clearance on all sides. Do not place a cold pan directly on a hot burner, and avoid stacking heavy cookware on a warm sheet pan. Store pans flat or vertically with separators so their rims do not carry unnecessary pressure.
When to Call a Pro or Replace
Professional metal repair is rarely economical for an inexpensive baking pan. Consider replacement if the base still rocks after one careful repair attempt, if the warp is more than about ¼ inch across the pan, or if food consistently pools against one edge. Replace the pan immediately if it has a crack, split seam, sharp burr, loose bonded layer, or lid that no longer fits securely.
For a replacement, a smaller 9- or 12-inch sheet is often easier to keep flat than a very large 16-inch sheet. Expect to spend roughly $20–$30 for a single everyday pan or $30–$45 for a three-piece set. Choose a straight, rigid base and rolled edges, and check that the dimensions fit your oven rack.
FAQ
Can I fix a warped stainless steel pan with salt or ice?
No. Salt, ice, and sudden temperature changes do not provide controlled correction. They can create uneven thermal stress and make the warp worse. Mechanical adjustment with a protected wood block is safer for a minor distortion.
Will baking soda remove the warp?
No. Baking soda can help clean baked-on residue, but it cannot reshape stainless steel. Clean the pan first so you can accurately see the warp, then use gradual pressure if the pan is structurally sound.
Can I use a warped pan in the oven?
Sometimes, but caution is necessary. A slight cosmetic bow may be usable for roasting if the pan remains stable and does not spill grease. Avoid using a rocking pan for liquid batter, cookies, or high-temperature cooking, where uneven contact can affect results or cause spills.
Is stainless steel better than aluminum for avoiding warping?
Neither material is completely warp-proof. Warping usually depends on thickness, construction, size, and temperature shock. Stainless steel may feel more rigid, while thin pans of either material can bend when overheated or cooled rapidly. Gradual cooling and a well-supported pan are the best prevention.