Key takeaways
- Use a thermometer: Nailing 110°F before adding the starter is the single biggest factor in success; too hot kills cultures, too cool stalls them.
- Do not disturb during incubation: Moving or stirring the yogurt while it sets disrupts the gel and can result in a thin, uneven texture.
- Strain for Greek yogurt: The only difference between regular and Greek yogurt is straining out the whey; the longer you strain, the thicker it gets.
- Save the whey: The liquid whey you strain off is protein-rich and works in smoothies, baking, or as a starter for lacto-fermentation, so do not pour it down the drain.
What's inside
Homemade yogurt is one of the most satisfying and economical things you can make in your kitchen. A single batch costs a fraction of store-bought, contains no added stabilizers or excess sugar, and lets you control everything from thickness to tang. The science is simple: yogurt is just milk fermented by live bacterial cultures held at a warm, steady temperature for several hours. A dedicated yogurt maker takes the guesswork out of that temperature control, delivering consistent results every time.
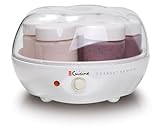
This guide walks you through making yogurt at home step by step, from choosing your milk and starter culture to incubating, straining for Greek-style thickness, and storing your finished batch. Whether you own a simple Euro Cuisine incubator, a digital model with temperature control, or a Greek yogurt maker with a strainer, the process below will help you produce creamy, probiotic-rich yogurt reliably in 2026.
As an Amazon Associate we earn from qualifying purchases at no extra cost to you.



⚡ Save on Your Next PC — Amazon Prime
Prime members get fast free shipping on the systems above, plus early access to Prime Day & Black Friday PC deals. New members get a 30-day free trial.
Watch: How to Make Yogurt at Home with a Yogurt Maker — Video Review
Choose Your Milk and Starter
Yogurt needs two ingredients: milk and a starter culture. Whole milk produces the creamiest, richest yogurt, while 2 percent and skim make thinner results; adding a few tablespoons of powdered milk boosts thickness in lower-fat batches. For the starter, use a few tablespoons of plain store-bought yogurt with live active cultures, or a powdered yogurt starter for the most consistent results. Each new batch can be started from a spoonful of your previous one, so after the first purchase you rarely need to buy starter again.
Heat and Cool the Milk
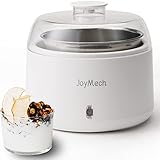
For the smoothest texture, gently heat the milk to about 180°F to denature the proteins, then cool it to roughly 110°F before adding the starter. This heating step is optional with ultra-pasteurized milk but produces noticeably thicker yogurt. Cooling to 110°F matters greatly: hotter milk kills the delicate cultures, while cooler milk slows fermentation. A kitchen thermometer removes the guesswork, and machines with temperature control, like digital models set to 68-127°F, hold the ideal range for you.
Incubate at a Steady Temperature
Stir the starter into the cooled milk, pour it into your yogurt maker’s jars or container, and let it incubate undisturbed. Most machines maintain around 108-110°F, the sweet spot for the cultures to multiply. Incubation typically takes 6 to 12 hours; shorter times give a milder, thinner yogurt, while longer fermentation produces a thicker, tangier result. Machines with a 48-hour timer, like several models here, let you dial in exactly the tang you prefer. Resist the urge to stir or move it during this window.
Strain, Chill, and Store
Once incubated, refrigerate the yogurt for several hours to stop fermentation and firm it up. For Greek-style yogurt, strain it through a fine-mesh strainer basket, like those on the Euro Cuisine GY50 or Party Dessert models, or through cheesecloth, removing the whey until it reaches your desired thickness. Store finished yogurt in airtight glass jars in the fridge, where it keeps for one to two weeks. Remember to reserve a few spoonfuls as the starter for your next batch.
Tips
- Use a thermometer: Nailing 110°F before adding the starter is the single biggest factor in success; too hot kills cultures, too cool stalls them.
- Do not disturb during incubation: Moving or stirring the yogurt while it sets disrupts the gel and can result in a thin, uneven texture.
- Strain for Greek yogurt: The only difference between regular and Greek yogurt is straining out the whey; the longer you strain, the thicker it gets.
- Save the whey: The liquid whey you strain off is protein-rich and works in smoothies, baking, or as a starter for lacto-fermentation, so do not pour it down the drain.
Frequently Asked Questions
Why is my homemade yogurt runny?
Thin yogurt usually results from milk that was not heated to set the proteins, an incubation temperature that was too low, or too short a fermentation time. Heating the milk to 180°F first, holding a steady 110°F, and incubating longer all improve thickness, as does straining.
How long does yogurt need to incubate?
Between 6 and 12 hours in most yogurt makers. Shorter incubation gives milder, softer yogurt, while longer fermentation produces a thicker, tangier result. Adjust the time to match your taste preference.
Can I make Greek yogurt at home?
Yes. Greek yogurt is simply regular yogurt strained to remove excess whey. Use a machine with a built-in strainer basket, like the Euro Cuisine GY50, or strain through cheesecloth until it reaches the thickness you want.
Do I need a yogurt maker, or can I use the counter?
A yogurt maker’s main job is holding a steady incubation temperature, which greatly improves consistency. You can improvise with an oven light or warm spot, but the machine removes the variability and produces reliable results every time.
Conclusion
Making yogurt at home is genuinely easy once you understand the rhythm: heat and cool the milk, stir in a live starter, incubate at a steady warm temperature, then chill and optionally strain. A dedicated yogurt maker handles the crucial temperature control, so all you supply is milk, a spoonful of starter, and patience. The payoff is fresh, probiotic-rich yogurt at a fraction of store prices, customized exactly to your taste, batch after batch.