Key takeaways
- Using the self-cleaning oven cycle: The extreme heat can create heavy smoke, damage oven components, and occasionally warp thinner cast pieces.
- Soaking cast iron in vinegar overnight: Long acid exposure can etch the surface instead of simply removing rust.
- Applying thick seasoning coats: Thick oil does not create a stronger finish; it creates sticky patches that can peel.
- Skipping the drying step: Bare cast iron can flash-rust in minutes, especially in humid kitchens.
- Using oven cleaner on enameled cast iron: Lye can damage glossy enamel, colored finishes, and decorative coatings.
- Trying to strip only the interior: Seasoning the exterior and handle helps protect the entire pan from rust.
Old cast-iron seasoning can turn sticky, flaky, uneven, or heavily carbonized after years of high-heat cooking, oil buildup, and inconsistent cleaning. Stripping it lets you reset the surface before applying fresh, thin layers of seasoning. Done poorly, though, the process can leave the pan rusted, warped, pitted, or coated in a gummy finish that cooks worse than the old one.
The safest approach for most home cooks is to remove the old coating with oven cleaner, rinse and dry the pan promptly, then re-season it in several thin coats. This method takes time, but it is effective for skillets, griddles, Dutch ovens, and many vintage cast-iron pieces. In 2026, it remains one of the most practical at-home ways to restore a neglected pan without aggressive grinding or risky high-heat methods.
As an Amazon Associate we earn from qualifying purchases at no extra cost to you. Product prices and availability are accurate as of the date shown and are subject to change.

What You Need
| Item | Why | Optional? |
|---|---|---|
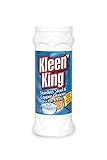
| Heavy-duty oven cleaner containing lye | Breaks down old seasoning and baked-on grease | No |
| Large heavy-duty trash bag or plastic storage bag | Keeps the oven cleaner wet while it works | No |
| Nitrile gloves and safety glasses | Protects skin and eyes from caustic cleaner | No |
| Plastic scraper or stiff nylon brush | Helps lift softened seasoning without gouging the iron | No |
| Steel wool or a stainless-steel scrubber | Removes remaining residue and light rust | No |
| Dish soap | Washes away cleaner residue after stripping | No |
| White vinegar | Short soak for light-to-moderate rust after stripping | Yes |
| Paper towels or lint-free cotton towels | Dries the pan and spreads seasoning in a very thin layer | No |
| High-smoke-point seasoning oil | Builds the new protective cooking surface | No |
| Sheet pan or aluminum foil | Catches drips during oven seasoning | Yes |
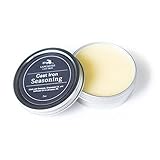
For the final seasoning, use a dedicated cast-iron conditioner or a neutral high-smoke-point oil. Lancaster Cast Iron Seasoning typically costs about $14, while Heritage Products Cast Iron Seasoning Oil is commonly around $13 to $15. Avocado oil, canola oil, grapeseed oil, or vegetable shortening also work well when applied sparingly.
Step-by-Step
-
1. Inspect the pan and remove loose debris — 10 minutes
Check the pan for cracks, deep pitting, a loose handle, or a warped base before you begin. A typical 10- to 12-inch skillet weighs 5 to 8 pounds, so place it on a sturdy protected work surface. Wash off food residue with hot water, dish soap, and a scrubber. Do not worry about preserving the old seasoning; the goal is to expose the buildup so the cleaner can work evenly.
Remove wooden handles, silicone grips, plastic knobs, and any non-cast-iron accessories. Do not use lye-based cleaner on cookware with painted exteriors, enamel coatings, or decorative finishes unless the manufacturer specifically permits it.
-
2. Apply oven cleaner outdoors or in excellent ventilation — 10 to 15 minutes
Put on nitrile gloves and safety glasses. Work outside, in a garage with the door open, or in another well-ventilated location. Place the pan inside a large trash bag or plastic storage bag. Spray the entire cooking surface and exterior with a generous, even layer of lye-containing oven cleaner. Aim for full coverage, especially around the rim, pour spouts, handle junction, and underside.
Avoid breathing spray mist and never mix oven cleaner with vinegar, bleach, ammonia, or other cleaners. Seal or tightly close the bag after spraying. Keeping the cleaner enclosed slows evaporation and gives it more time to dissolve the old seasoning.
-
3. Let the cleaner work — 12 to 24 hours
Leave the bagged pan in a secure area away from children, pets, direct sun, and freezing temperatures. For a lightly coated skillet, 12 hours may be enough. Thick black crust, sticky layers, or decades of buildup may need a full 24 hours.
Do not try to speed up the process by heating the bag or leaving it in the sun. Excess heat can weaken plastic, create leaks, and increase exposure to caustic cleaner.
-
4. Scrub, rinse, and repeat if needed — 20 to 40 minutes
With gloves still on, open the bag carefully and use a plastic scraper or nylon brush to loosen the softened coating. Rinse the pan thoroughly under hot running water. Then scrub with dish soap and steel wool or a stainless-steel scrubber until the iron appears mostly bare and dull gray.
If black patches remain, repeat the oven-cleaner treatment for another 12 to 24 hours. Two rounds are common for heavily neglected cast iron. Avoid using power sanders, angle grinders, or abrasive flap discs. They can erase casting marks, round off crisp edges, and leave the cooking surface uneven.
-
5. Treat rust briefly, if present — 5 to 30 minutes
Surface rust often appears immediately after stripping because bare cast iron oxidizes quickly. For scattered orange spots, scrub with steel wool and soapy water first. For broader rust, mix equal parts white vinegar and water in a nonreactive tub large enough to hold the pan. Soak for 5 to 10 minutes, scrub, and check the surface.
Do not leave cast iron in vinegar for hours. Acid can begin etching the iron and make the surface rougher. For stubborn rust, repeat short soaks rather than extending one soak beyond 30 minutes total.
-
6. Dry the bare iron immediately — 10 to 15 minutes
Towel-dry the pan thoroughly, then place it upside down in a 200°F oven for 10 minutes or over low stovetop heat until every trace of moisture is gone. The pan may darken slightly as it dries; that is normal. Let it cool until it is safe to handle, but season it while it is still slightly warm.
-
7. Apply an extremely thin coat of seasoning — 5 minutes
Pour about 1 teaspoon of oil into a 10- to 12-inch skillet. Rub it over the interior, exterior, handle, and rim with a paper towel. Then use a fresh dry towel to wipe off nearly all of it. The pan should look satin-like, not wet or glossy. Excess oil is the main cause of sticky, blotchy seasoning.
-
8. Bake and repeat for a durable finish — 1 hour per coat
Heat the oven to 450°F. Place the pan upside down on the center rack and put a foil-lined sheet pan on the lower rack to catch any drips. Bake for one hour, then turn off the oven and let the pan cool inside for at least 30 minutes. Repeat the thin-oil-and-bake process two or three times for a stronger starting finish.
The pan will not become perfectly black after one session. A new seasoning layer often begins bronze or dark brown and gradually deepens with regular cooking.
Mistakes to Avoid
- Using the self-cleaning oven cycle: The extreme heat can create heavy smoke, damage oven components, and occasionally warp thinner cast pieces.
- Soaking cast iron in vinegar overnight: Long acid exposure can etch the surface instead of simply removing rust.
- Applying thick seasoning coats: Thick oil does not create a stronger finish; it creates sticky patches that can peel.
- Skipping the drying step: Bare cast iron can flash-rust in minutes, especially in humid kitchens.
- Using oven cleaner on enameled cast iron: Lye can damage glossy enamel, colored finishes, and decorative coatings.
- Trying to strip only the interior: Seasoning the exterior and handle helps protect the entire pan from rust.
How Often
Most cast-iron pans do not need to be fully stripped on a schedule. Strip old seasoning only when it is flaking, severely sticky, deeply carbonized, rusty beneath the coating, or contaminated by burnt residue that will not scrub off. For many well-maintained pans, that may mean never.
Instead, maintain the finish after cooking: wash, dry with heat, and wipe on a nearly invisible film of oil if the surface looks dry. A single oven seasoning coat once or twice a year can refresh a pan that has lost some slickness without requiring a complete reset.
When to Call a Pro or Replace
Consider a professional restoration service for valuable antique cookware, especially pieces with maker marks, rare logos, ornate handles, or collector value. Professionals can remove corrosion without unnecessarily grinding away original casting details.
Replace a pan if it has a visible crack, a loose or cracked handle, severe structural pitting, or a base so warped that it rocks noticeably on a flat cooktop. Minor unevenness is common in vintage cookware, but a pan that spins, wobbles, or cannot make reliable contact with an electric or induction surface may not be worth restoring for everyday use.
FAQ
Can I strip old seasoning from cast iron with just heat?
It is possible, but it is not the best choice for most homes. A grill fire or very high heat can burn off seasoning, yet it may also warp the pan, create excessive smoke, and leave heavy rust behind. Lye-based oven cleaner is slower but more controlled.
Will oven cleaner damage cast iron?
Used as directed, lye-based oven cleaner removes organic seasoning and grease without harming bare cast iron. It should not be used on enamel, painted surfaces, aluminum, wood, or plastic components. Rinse thoroughly and dry the pan immediately after cleaning.
Why is my newly seasoned pan sticky?
Sticky seasoning usually means too much oil was applied or the pan was not heated long enough to polymerize the oil. Scrub the tacky areas with hot water and a nonabrasive scrubber, dry the pan, then apply a much thinner coat and bake it again.
How many seasoning coats does a stripped pan need?
Two to three oven-baked coats provide a reliable starting surface for most pans. After that, regular cooking with fats will continue building the finish. Foods such as bacon, sautéed vegetables, cornbread, and fried potatoes are often easier on new seasoning than acidic tomato sauces or long wine-based braises.